Making A Blog Post
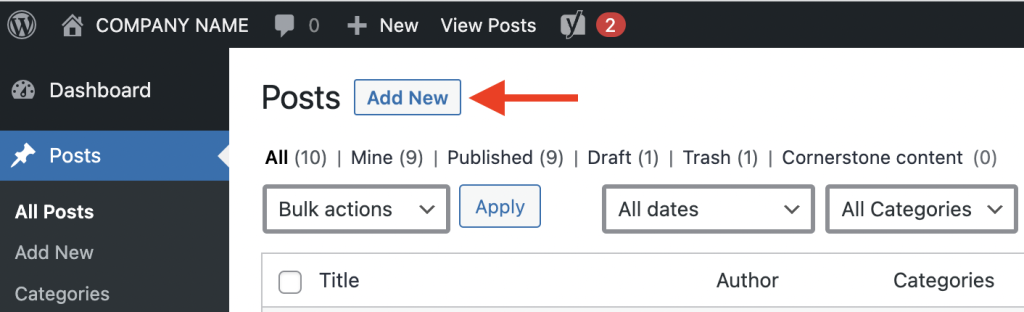
Let’s Start with Adding a Blog Post
Let’s Update Your New Blog Post
WHAT DOES EVERYTHING MEAN?
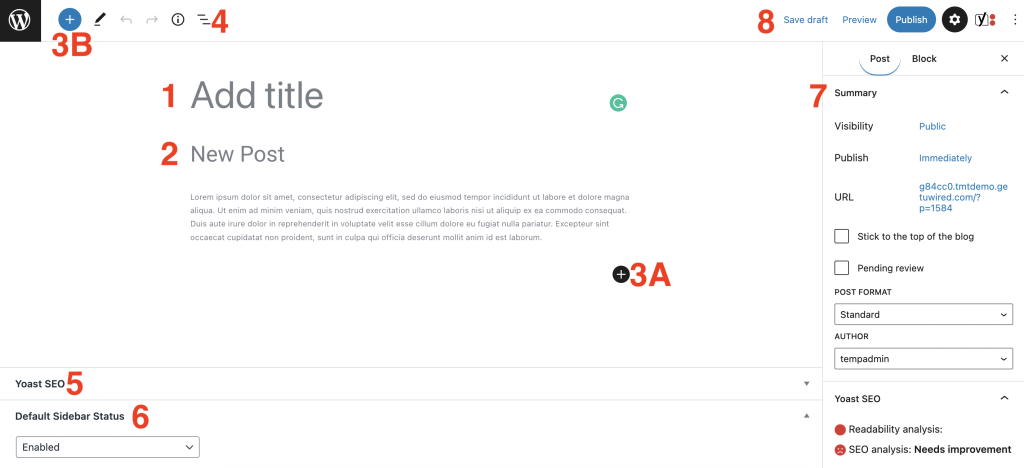
1. TITLE
This will be the blog’s posted title and name.
This will also be used in the URL slug unless you manually update it.
This title will allow viewers to know what the blog is about when reviewing a blog list or blog feed.
2. NEW POST
This is where your content will be posted and changed.
You may copy and paste, or just type right on this page.
3A / 3B. ADD BLOCK
In these two locations, you will find similar “+” symbols. One in blue, and the other in black. Their function is the same. The only difference is that 3B will only show a few block options, but you can use the search bar to find more blocks for your page.
You can add items like, but not limited to, images, buttons, videos, or text boxes.
4. LIST VIEW
As you expand and added to your blog post, you might find you wish to move, clone, or duplicate features you have already utilized.
Use this feature to have an expanded view of the layout. You may drag and drop features, or hover to locate 3 dots that will allow for more options.
5. YOAST SEO
This is an active SEO plug-in that you are welcome to use as needed. We don’t set up anything by default within this feature. You are responsible for blog post SEO.
6. DEFAULT SIDEBAR STATUS
RECOMMEND: Leave this set to “Enabled”.
If you change/update this setting to be “Disabled” you will be responsible for adding your own form to this page. You may do so in multiple ways, and in multiple locations. To add this to your page, please use one of the “Add Block” buttons (list item above 3A & 3B) to locate “Form Selector”.
The Style will either be ‘Blog’ (this has no image) or ‘Blog with Image’. Then you select the form you wish to apply like Discovery Call or Free Guide.
The only reason you would want to update this setting is if you don’t want the current Blog’s Form to be the Default option. This might mean you have a special offer or a special type of post.
NOTE: If you are updating your forms because you don’t wish to use the current Blog’s Default on all/any blogs, or if the default is outdated or incorrect, please email us at support@tmt.getuwired.com. We would be happy to talk this out and get your default changed as needed.
7. PAGE SUMMARY
VISIBILITY: Leave as Public.
PUBLISH: You may publish a blog immediately, by leaving this setting alone. Or, you may click on the word “Immediately” and update the blog post date and time to a future scheduled time.
URL: This should be set and based on the Blog Title. However, if you want to change it, or need to update it, you may do that here. NOTE: If you updated the Blog’s Title after creating the blog itself, then this URL will still be worded based on the initial Blog Title, so you might want to review this.
TEMPLATE: Leave a Default Template.
AUTHOR: Check that it’s your user or the person you wish to set.
DISCUSSION: Uncheck the “Allow Comments” box to prevent spam comments.
8. PAGE PUBLISHING
SAVE / SWITCH TO DRAFT: Use this button to save a draft of the blog and not have it posted on your blog page. You may also use this button – AFTER – publishing to take it off of the blog page.
PREVIEW: This allows you to see the “real-life” image of the blog without going straight to published.
PUBLISH / UPDATE: This will publish the blog post and add it to your blog post page. This is also the feature you use to save any updates to the blog when live and viewed on the site.
Help Resources
How to Add Your Own Form
Continuation of #6 Above
How to Add Images to the Text
How To Use Merge Fields
If you would like to incorporate merge fields into your Blog Post, you have the five options below. By placing any of these into your post, your information associated with that merge field will auto-populate once you publish the post.
[company_name]
[sales_phone_number]
[support_phone_number]
[service_area]
[start_year]
Here is an example of this in action: “If you have any questions, please call Great Company at 555-555-5555”